

Tile adhesive functions as polymer-modified tile mortar cement/glue and exists as a powder material that derives from cement polymers.This high-bonding adhesive emerges when water is added to the powder substance to create a bond between tiles.
This adhesive system implements a strong bond between tiles and walls or floors that stops tile dislodgement during the anticipated lifespan. The tile adhesive serves two essential functions: first, it offers stability to tile installations and second, it spreads tile weight evenly, which prevents surface irregularities from occurring.
Water protection capabilities exist within multiple tile adhesives to safeguard damp areas, particularly bathrooms and kitchens where moisture is frequent. Specific tile adhesive versions contain built-in flexible properties that allow limited room movement without breaking tile bonds. These flexible tile adhesive systems create an ideal situation for surfaces that move because of high-traffic movement or consistent heavy pedestrian use.
To achieve successful tile installations and all associated benefits, you must select the correct tile adhesive for your requirements and then carefully follow tile installation procedures for wall or floor applications.
1)The surface rigidness determines the tile and stone installation.
2) Material
3) Strength and stability
4) Chemical adaptability
5) Water and Dampness
6) Shrinkage
Step 1: Surface Preparation
Step 2: Mix the Adhesive
Step 3: Apply the Adhesive
Step 4: Place the Tiles
Step 5: Drying Time
Step 6: Grouting
Tile installation through adhesive requires accurate supplies combined with correct surface preparation and professional approach at lapifix in Morbi along with any other area. Since Morbi is a major hub for tile manufacturing, high-quality tile adhesives are readily available. The following guideline shows how to repair tiles with adhesive under Morbi circumstances:
Tile adhesive( The selection of grouts depends on tile types together with specific areas including walls, floors and exteriors or wet regions etc.)
Notched trowel
Tile spacers
Rubber mallet
Level
Grout
Mixing bucket
Sponge & clean water
Tiles (preferably Morbi-made!)
Begin by removing dust together with oil as well as loose particles or previous coatings from the surface. Before application the substrate needs to be clean with no moisture presence on surfaces that are flat and dry.
The concrete surface requires dampening using a gentle water touch as long as you prevent pooling of water from occurring.
All adhesive application must adhere to manufacturer-directions stated in instructions
To create a faultless liquid paste you need to blend the powder mix with pure water.
Mix the adhesive and allow it to remain for 5 minutes before remixing. Use within 30–45 minutes.
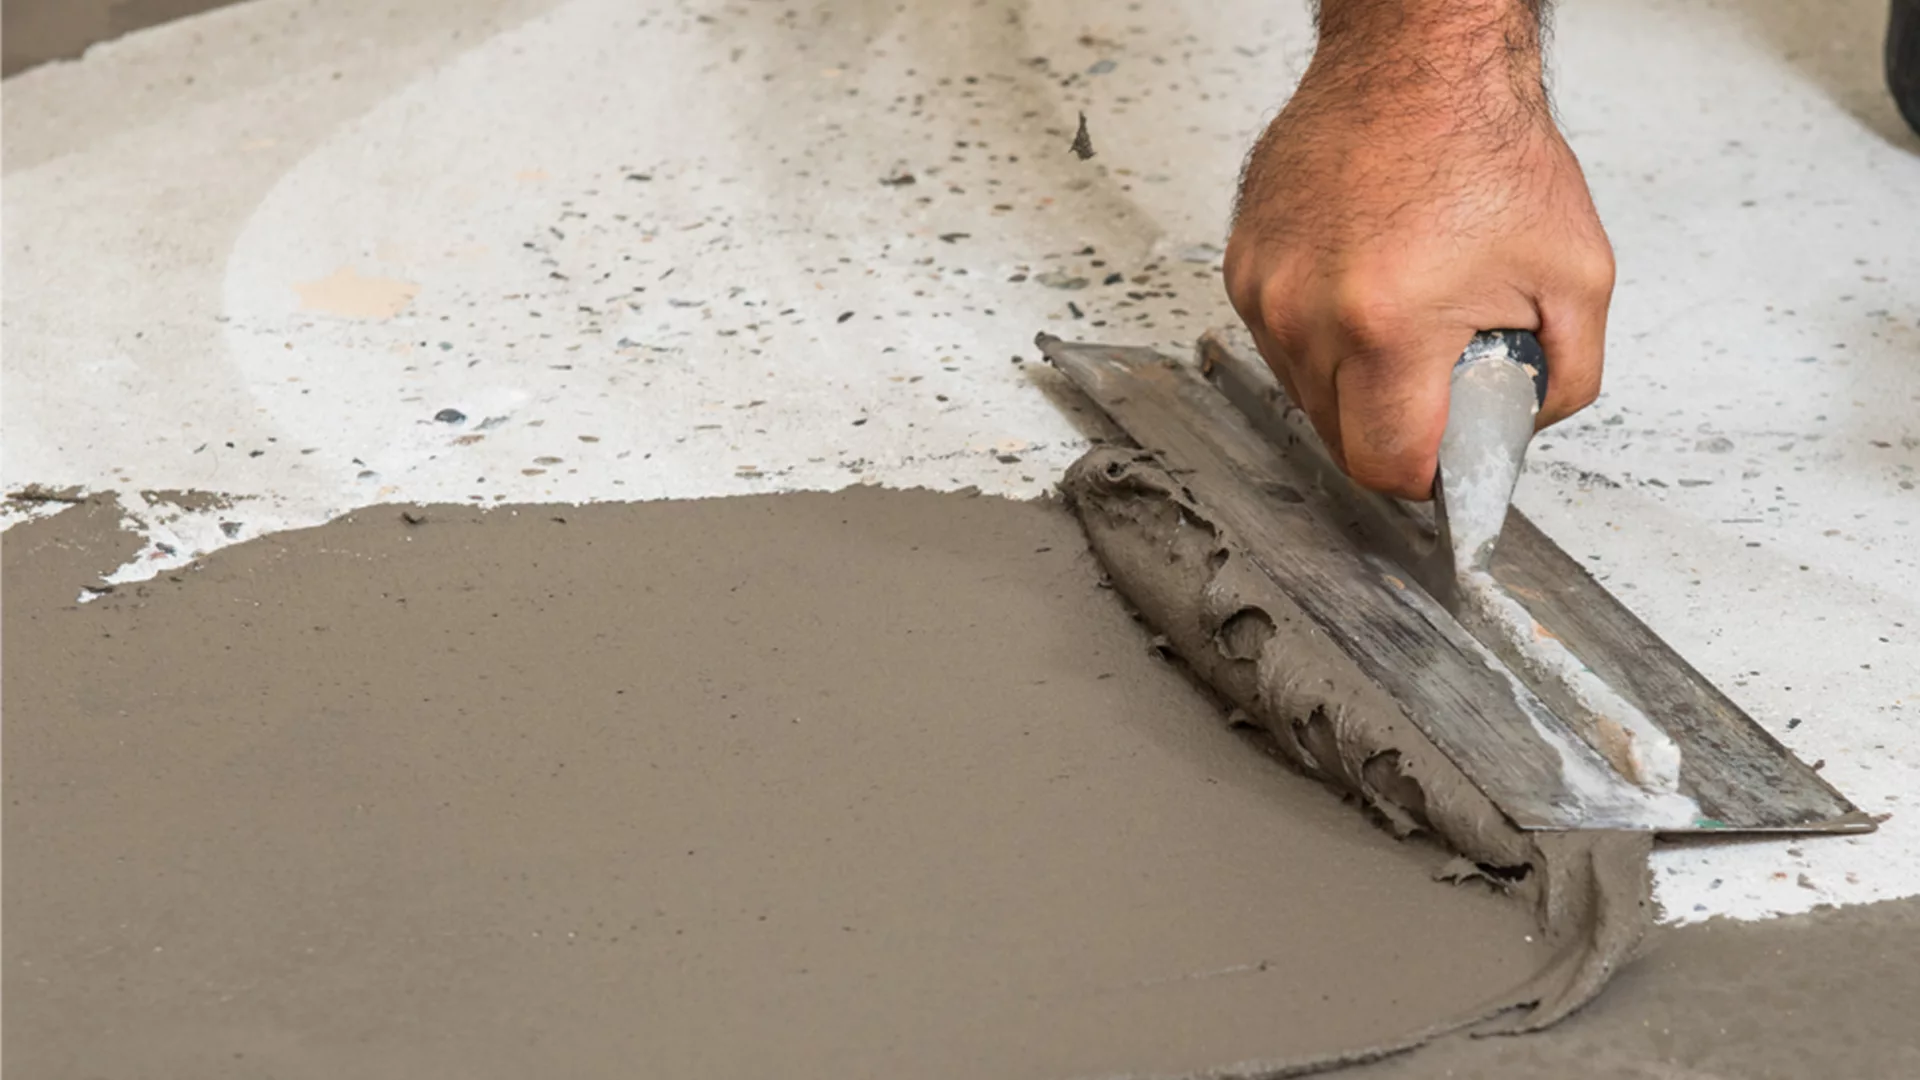
Your notched trowel will help produce an even adhesive layer on the substrate surface.
In case of large-format tile installation the tile manufacturing team should add adhesive to both the tile face and its back.
A 45-degree angle position of the trowel tool creates better adhesion through its ridged pattern.

Place the tile softly into the adhesive base.
Use a rubber mallet to apply light taps so that the tile gains secure attachment.
Spacers should be placed between tiles for grouting to maintain equal spacing between them.
A level should be used for checking flatness and alignment in the process.
The adhesive needs to cure for 24 hours before anyone walks on the surface or applies the grout.
The surface requires protection from water and continued foot movement through this period.
Grout application between tiles should start after adhesive completion of its full curing process.
You can use a rubber float to disperse the spread material while a damp sponge should clean additional amounts that remain.
Grouting requires waiting time according to product instructions that typically amount to twenty-four hours.

The correct choice of tile adhesive plays an essential role in tile installation success because it affects the outcome of various tile types including floor tiling with sticker tiles. To make a suitable selection follow these guidelines for ceramic tile adhesive choice.
The material composition of tiles determines what type of adhesive should be used for installation. Sticker tiles constructed from vinyl or PVC need flexible adhesive materials to enable their movement and flexing whenever they occur.
Examine the surface which will receive tile installation as part of your evaluation process. Floors that receive tiling must have a smooth level surface with no cracks and uniformity as their foundation. The selection of adhesive must match the substrate characteristics such as concrete, plywood or present tiles.
Select adhesives that have characteristics suitable for achieving your specific tile installation requirements. Select adhesives especially made for sticker tiles to receive maximum bond strength and both flexibility and moisture resistance for everlasting performance.
Review all tile and adhesive recommendations provided by the manufacturer. The manufacturers typically specify which adhesive works best with their tiles while ensuring proper compatibility and performance quality
Complete installation should begin after performing a compatibility test on a small section of tiles using adhesive from the test area. Such testing verifies the adhesive's ability to bond properly with both tiles and substrates as well as maintaining clear surfaces
Tile Type: Different types of tiles may require different types of adhesive.
Surface Type: The decision between different types of adhesives hinges upon the surface type (wall, floor, etc.).
Choose a water-resistant adhesive when moisture becomes a regular problem in the area.
Ventilation: Ensure adequate ventilation during the drying process.
The fastening process in Morbi benefits from the dry and warm climate yet you should avoid direct sun exposure while performing maintenance during peak heat periods.
The majority of Morbi tiles have vitrified or glossy finishes therefore tile adhesive should be polymer-modified to obtain optimal bonding strength.
Using tile adhesive for tile installation requires straightforward steps that lead to a lasting professional quality if carried out with precision. Successful tile adhesive application requires appropriate surface preparation in combination with proper adhesive selection together with adherence to correct application techniques. When you need to replace one tile or install a complete floor using tile adhesive you get optimal outcomes for your tiling project by performing correct applications.
Q1: What is tile adhesive?
A: Tile adhesive is a ready-mixed or powdered compound used to bond tiles to walls, floors, or other surfaces. It ensures strong adhesion and prevents tiles from shifting or detaching.
Q2: Can I use tile adhesive for all types of tiles?
A: Yes, but make sure to choose the right type of adhesive for your specific tile (ceramic, porcelain, natural stone) and surface (wall, floor, wet areas).
Q3: Do I need to prepare the surface before applying tile adhesive?
A: Absolutely. The surface must be clean, dry, and free from dust, grease, or loose particles for the adhesive to bond properly.
Q4: How do I apply tile adhesive?
A: Spread the adhesive evenly using a notched trowel, press the tile into place, and gently twist or tap it to ensure good contact.
Q5: How long does tile adhesive take to dry?
A: Drying times vary, but typically it takes 24 hours to fully set. Fast-set adhesives may dry in 2–4 hours. Always check the manufacturer’s instructions.
Q6: Can I fix loose tiles using tile adhesive?
A: Yes, remove the loose tile, clean the surface, reapply adhesive, and set the tile back in place.
Q7: Should I use grout with tile adhesive?
A: Yes, after the adhesive dries, grout is applied between the tiles to seal joints and enhance the appearance.
Q8: Is it necessary to use a primer before adhesive?
A: On highly absorbent or non-porous surfaces, using a primer may improve adhesion. Refer to the adhesive’s guidelines.
Q9: What tools do I need to apply tile adhesive?
A: You’ll need a notched trowel, level, tile spacers, and possibly a rubber mallet and sponge for cleanup.
Q10: Can tile adhesive be used in wet areas like bathrooms?
A: Yes, but choose a waterproof or water-resistant adhesive specifically designed for wet environments.