

Choosing a tile adhesive can feel like the important part of a tiling project. You compare bonding strength, tile compatibility, working time and application conditions. Then comes the humble notched trowel. It looks simple, but choosing the wrong one can quietly undermine an otherwise excellent installation.
The right Tile Adhesive Trowel Size helps control the amount of adhesive spread across the substrate, creates consistent ridges and improves contact between the tile and adhesive bed. If you are comparing products such as Lapifix Tile Adhesives, the next question should not simply be, “Which adhesive should I buy?” It should also be, “How am I going to apply it?”
That is where this guide comes in. We’ll look at how notch dimensions work, how tile size affects your choice, why floor and wall applications can differ, and what changes when you move from standard ceramic tiles to large-format porcelain. The goal is simple: help you make a practical decision before the first bucket of adhesive is mixed.
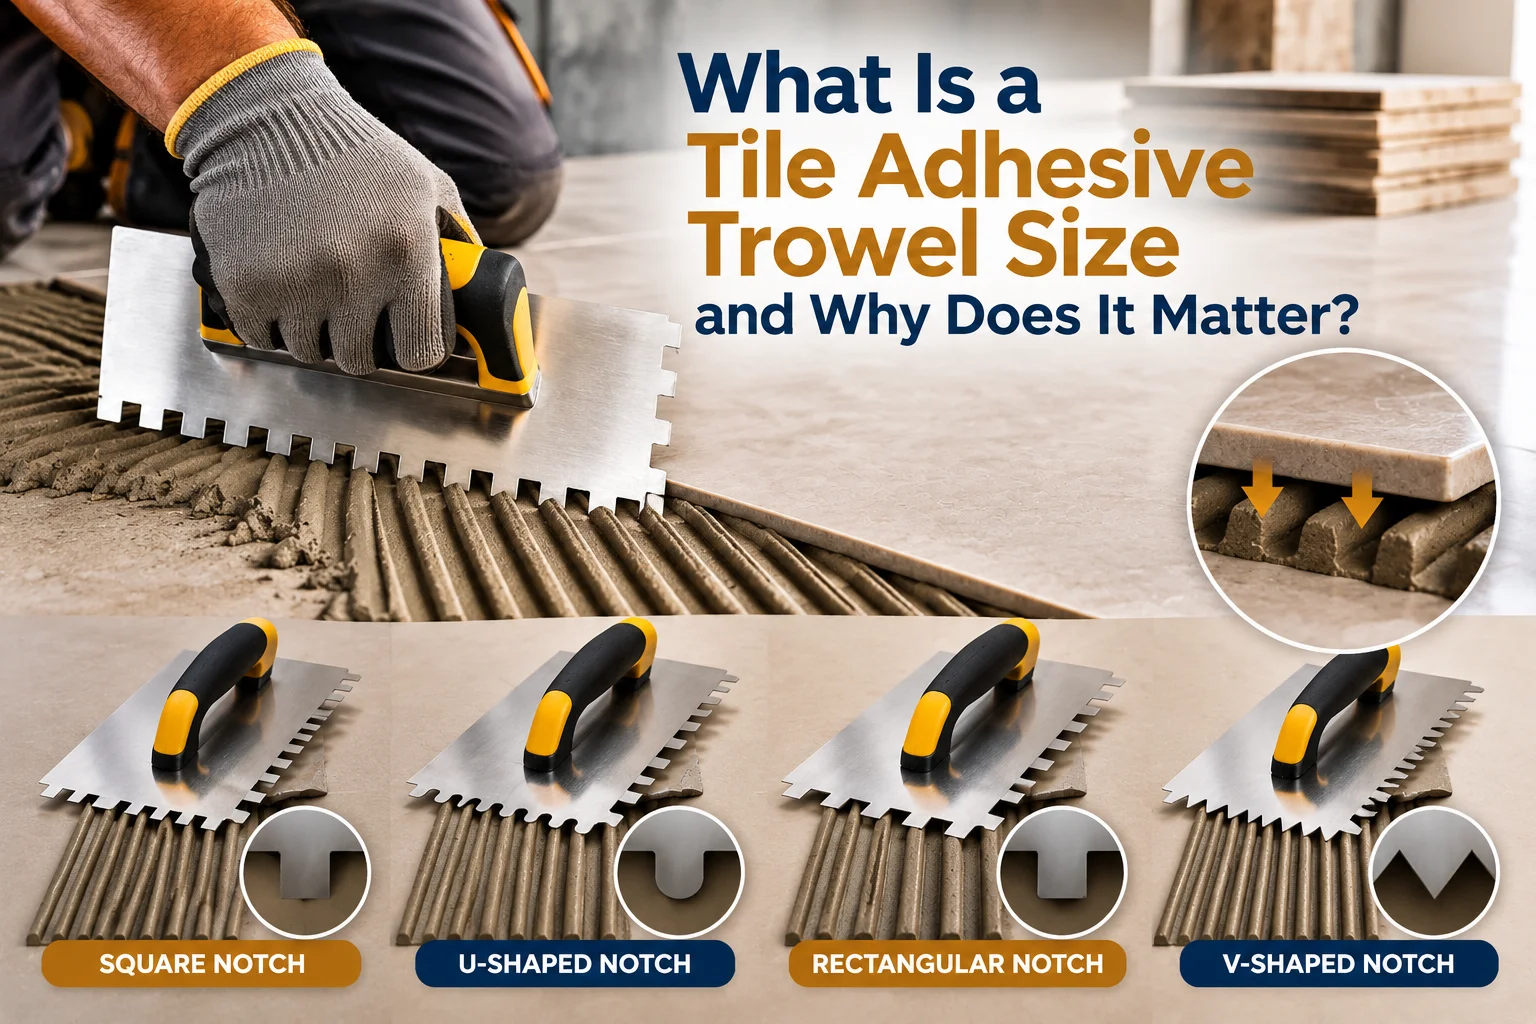
A Tile Adhesive Trowel Size refers to the dimensions and configuration of the notches on a trowel used to spread tile adhesive. You will commonly see descriptions such as 6 mm, 8 mm, 10 mm or 12 mm, along with different notch shapes such as square, U-shaped or V-shaped. The notch geometry influences how much adhesive is deposited and the thickness of the resulting ridges.
Think of the trowel as a metering tool rather than just something used to “spread glue”. A flat side can be used to key adhesive into the substrate, while the notched side creates regular ridges. When a tile is pressed into those ridges correctly, the adhesive can flatten and form a more consistent contact layer.
The important point is that there is no universal trowel that works perfectly for every tile. A small ceramic wall tile does not usually need the same adhesive bed as a large-format porcelain slab. Tile dimensions, back profile, substrate flatness, installation orientation and adhesive characteristics all influence the final selection.
A notched trowel creates parallel ridges in the adhesive. These ridges are not decorative. Their purpose is to control the adhesive layer and make it easier to achieve consistent coverage when the tile is bedded correctly.
During installation, the trowel is generally held at a consistent angle while the adhesive is combed in straight lines. The tile is then placed and moved slightly across the ridges to collapse them. This is why simply spreading adhesive randomly with a flat trowel is not equivalent to using the correct notched trowel for tile installation.
The Tile Adhesive Trowel Size therefore affects more than convenience. A notch that is too small can leave insufficient adhesive beneath the tile. A notch that is unnecessarily large can create an adhesive bed that is difficult to control and may increase material consumption. The objective is not to use the biggest trowel available; it is to achieve the required coverage with a suitable adhesive layer.
For professional installations, coverage should be checked rather than assumed. Lift a freshly placed tile periodically and inspect the underside. If substantial areas remain without adhesive contact, the installation method, substrate condition, adhesive selection or trowel size may need adjustment.
One of the most useful rules for choosing a Tile Adhesive Trowel Size is to start with the tile rather than the trowel. Smaller tiles generally require less adhesive than large-format tiles, although tile thickness and back profile can change the equation.
For smaller ceramic wall tiles, a smaller notch may provide adequate coverage without creating an unnecessarily thick adhesive bed. Floor tiles often require a different approach because they can experience greater loading and movement, particularly in busy areas.
As tile dimensions increase, the challenge becomes more demanding. Large tiles can bridge small irregularities in the substrate, creating voids beneath sections of the tile if the adhesive is not distributed properly. In these situations, a larger notch and more deliberate installation technique may be necessary.
This is also why a Tile Adhesive Trowel Size guide should never be treated as a rigid chart where one notch automatically equals one tile dimension. Manufacturer recommendations, tile requirements and site conditions should all be considered together.
There is no single international rule that assigns one exact notch to every tile dimension. However, installers commonly work within a range of notch sizes based on tile format and application.
For smaller ceramic wall tiles, a smaller notched trowel is often sufficient when the substrate is properly prepared and reasonably flat. Medium-format floor and wall tiles may call for a medium notch, while larger porcelain tiles often need a deeper notch to help achieve appropriate adhesive coverage.
For large-format tiles, the Tile Adhesive Trowel Size can move into the larger-notch range, particularly where the tile dimensions and substrate conditions demand a more substantial adhesive bed. Some large-format installation guidance recommends larger sloping notches on the substrate and smaller notches for back-buttering the tile. Mapei, for example, describes the use of sloping notches of at least 10 mm for spreading adhesive on the substrate in one large-format installation method, together with smaller notches on the tile back.
The important takeaway is that the numbers are starting points, not automatic prescriptions. Always check the adhesive manufacturer's technical data and the tile manufacturer's installation guidance before choosing the final trowel.
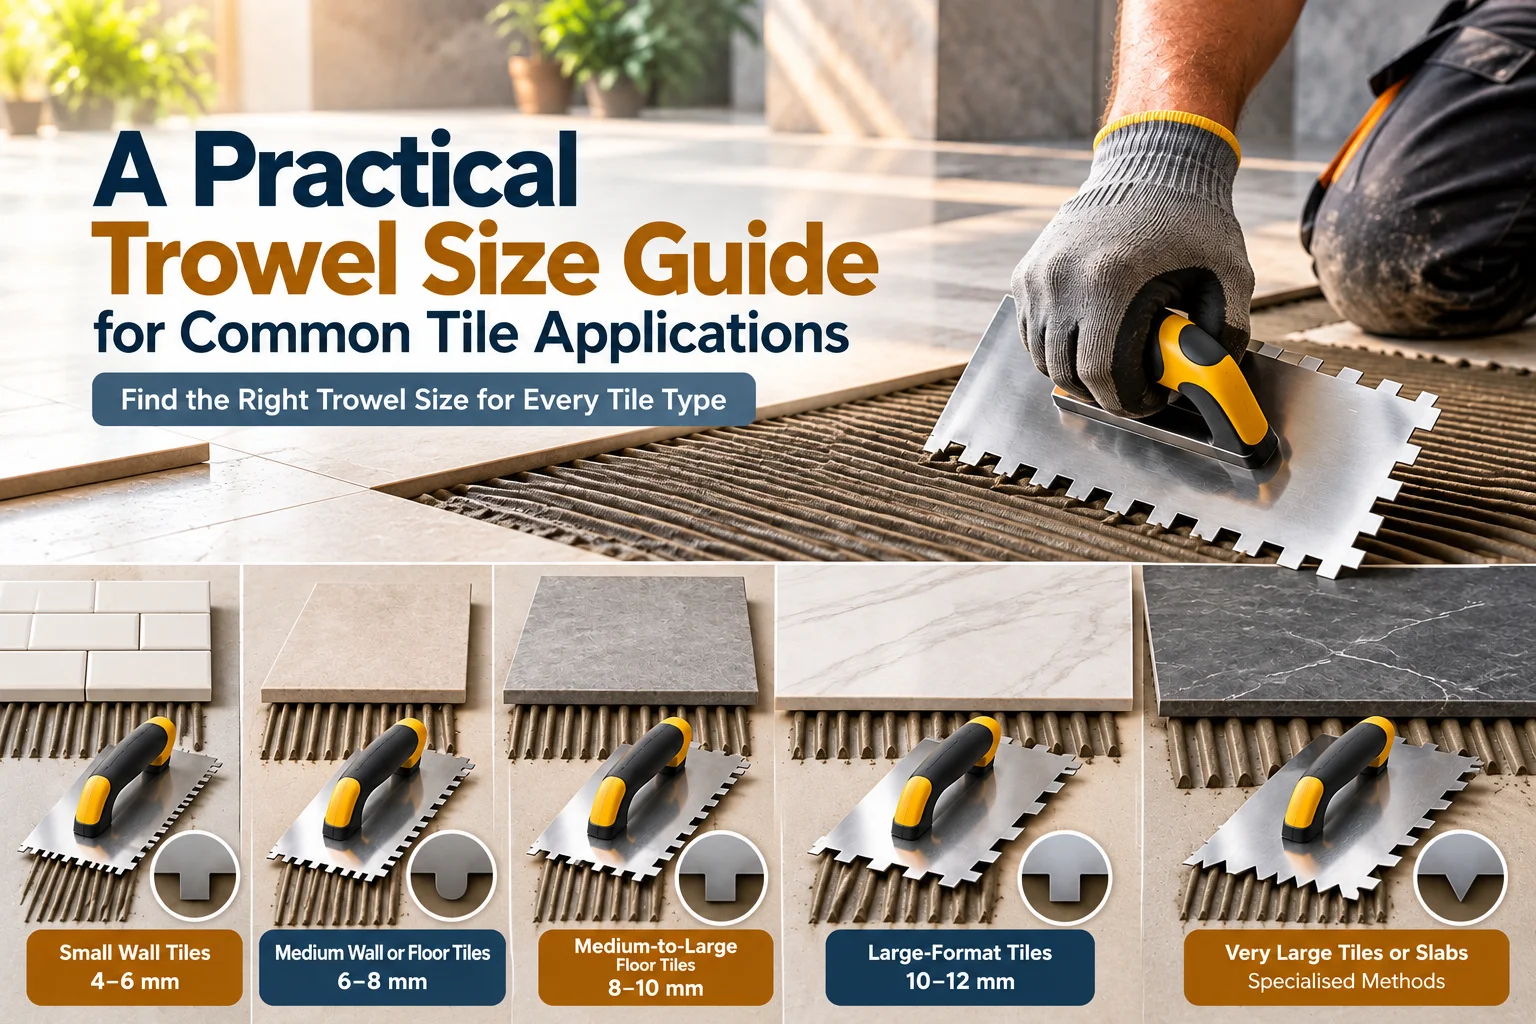
Small wall tiles: approximately 4–6 mm notch
Medium wall or floor tiles: approximately 6–8 mm notch
Medium-to-large floor tiles: approximately 8–10 mm notch
Large-format tiles: approximately 10–12 mm or larger, depending on the installation system
Very large tiles or slabs: specialised installation methods may be required
These ranges are practical starting points rather than universal standards. The final selection should be validated through an actual coverage check.
Floor tiles usually demand careful attention to adhesive coverage because the surface may experience concentrated loads, foot traffic, furniture loads and repeated movement. A beautiful tile installation is not much use if large sections of the tile are effectively floating over empty space.
The Tile Adhesive Trowel Size for floor tiles depends heavily on the tile format. A compact ceramic tile and a large porcelain floor tile should not automatically receive the same treatment. The larger the tile, the more important consistent adhesive distribution becomes.
Substrate flatness is another major factor. If the floor has significant unevenness, simply increasing the trowel notch is not necessarily the correct solution. Adhesive should not be used as a substitute for proper substrate preparation unless the specific adhesive system is designed and approved for that purpose.
For floor installations, combing the adhesive in consistent lines and bedding the tile properly helps collapse the ridges. The goal is a continuous, well-distributed adhesive layer rather than isolated blobs or random patches.
Wall tiles introduce another consideration: gravity.
A wall adhesive system must hold the tile securely while the adhesive develops its bond. That makes the correct Tile Adhesive Trowel Size particularly important when installing larger or heavier tiles vertically.
For smaller ceramic wall tiles, a smaller notch may be practical. Larger porcelain or stone tiles can require a deeper notch and, depending on the installation method, additional adhesive application to the back of the tile.
The adhesive itself also matters. Lapifix LX Super, for example, is described by the manufacturer as a polymer-modified cement-based adhesive suitable for ceramic and porcelain vitrified tiles on internal floors and walls, including tile-on-tile applications. Its stated classification is C2TE under EN 12004.
That does not mean the same trowel should automatically be used for every LX Super installation. The tile format, substrate and installation conditions still need to be assessed.
Large-format tiles look fantastic because they reduce grout lines and create a clean, architectural appearance. They also leave less room for installation mistakes.
With a large tile, a small area of poor adhesive contact can become a surprisingly large void. The tile may look perfectly level from above while sections underneath have inadequate support.
For this reason, the Tile Adhesive Trowel Size becomes particularly important for large-format porcelain, natural stone and other large surfaces. The installer needs enough adhesive to achieve the required coverage while maintaining control over the bed thickness.
Back-buttering may also be recommended depending on the tile and installation system. In this process, a suitable layer of adhesive is applied to the back of the tile in addition to the adhesive combed onto the substrate. The objective is improved contact, not simply adding more adhesive for the sake of it.
Lapifix LX Premium is specifically described as a highly flexible adhesive suitable for large-format vitrified tiles, natural stone, marble, terrazzo and other demanding internal or external applications.
It is easy to become obsessed with the number printed on a trowel. In reality, the more important question is whether the chosen system produces the required adhesive coverage.
Two installers can use the same Tile Adhesive Trowel Size and achieve different results. Why? Trowel angle, pressure, adhesive consistency, substrate condition, combing direction and tile movement all influence the final adhesive bed.
This is why coverage should be checked during installation. Spread the adhesive, place the tile, press and move it as required, then lift it carefully to inspect the underside. If the adhesive has not transferred sufficiently, investigate the cause before continuing across the entire project.
A larger notch is not automatically better coverage. If the adhesive ridges are too tall, poorly collapsed or applied over an unsuitable substrate, simply changing the trowel may not solve the underlying problem.
The angle at which you hold the trowel affects the height of the adhesive ridges. A relatively consistent angle helps produce predictable results across the installation area.
Holding the trowel at a lower angle can reduce the effective ridge height, while a steeper angle can increase it. This means two people using the same Tile Adhesive Trowel Size may apply noticeably different amounts of adhesive.
Professional installation therefore relies on technique as much as equipment. Keep the trowel movement consistent, maintain the recommended angle and avoid repeatedly going over adhesive after it has begun to skin.
For larger tiles, straight, consistent adhesive ridges are particularly useful because they can collapse more predictably as the tile is bedded.
Notch shape matters too.
Square-notched trowels create a different adhesive ridge profile from U-shaped or V-shaped designs. The choice can depend on the adhesive, tile and installation technique.
For many modern tile installations, square or appropriately sized notches are commonly used because they provide a predictable amount of adhesive. V-shaped notches can be useful for some smaller tile applications, but they are not automatically the right choice for every project.
The Tile Adhesive Trowel Size should therefore be considered alongside notch shape. Saying “use a 10 mm trowel” without considering whether the tool has square, U-shaped or another notch configuration leaves out an important part of the installation equation.
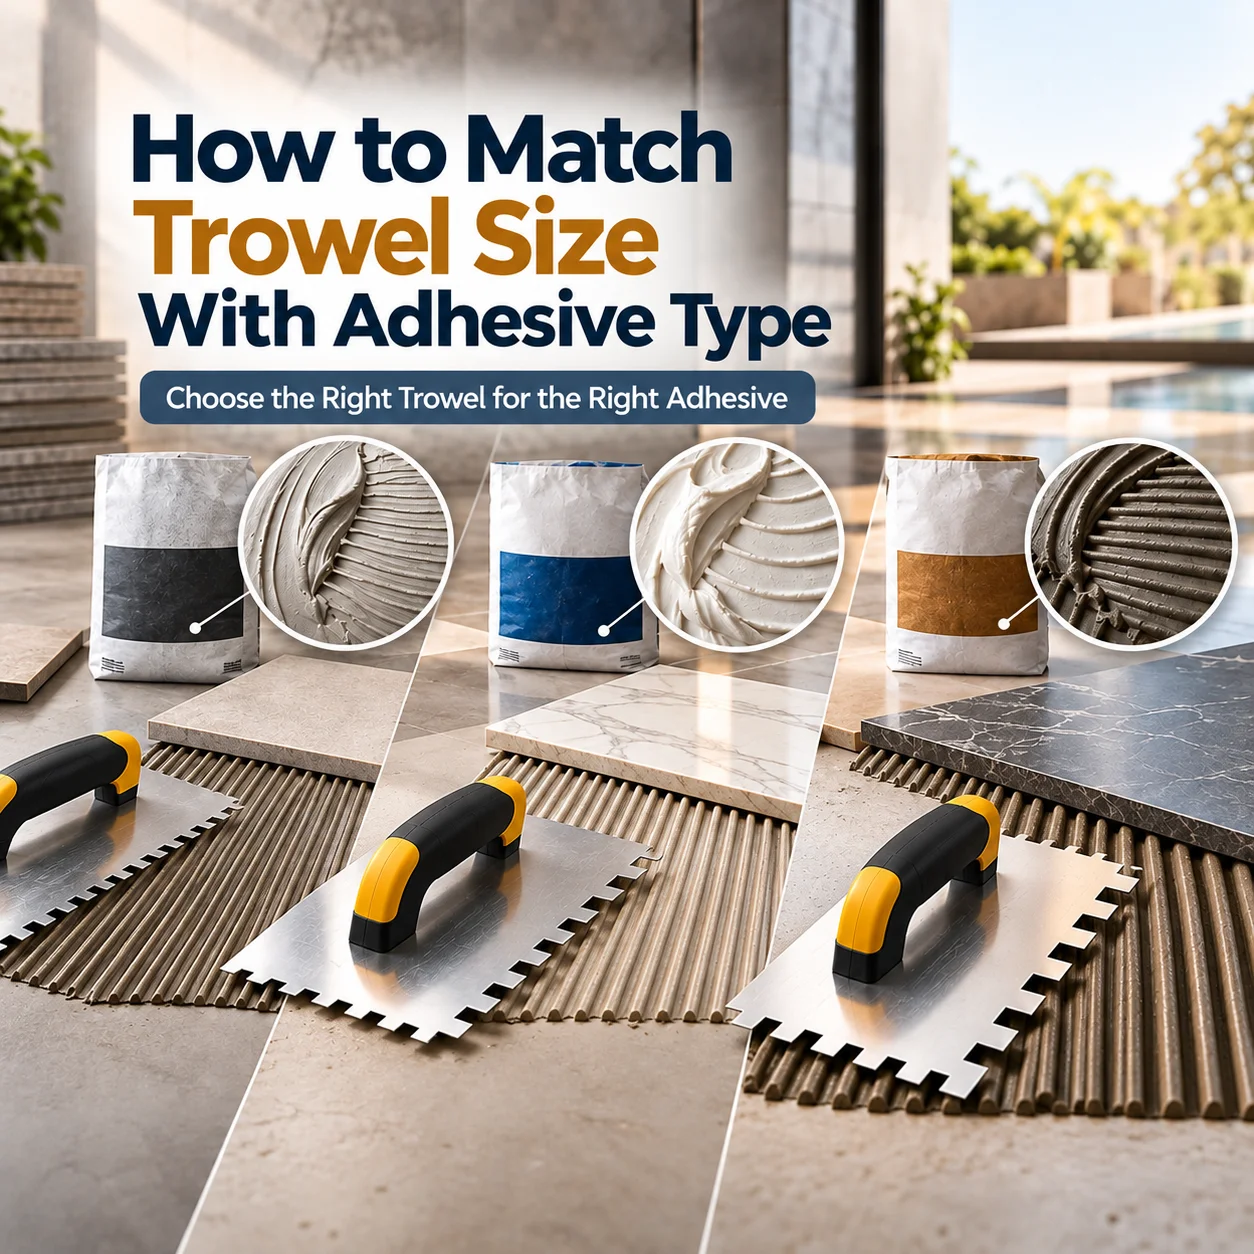
The adhesive and trowel work as a system. A Tile Adhesive Trowel Size that works well with one product may not be ideal with another.
Cement-based adhesives, polymer-modified adhesives and specialised products can have different working characteristics. Some products are designed for standard internal applications, while others are developed for large-format tiles, external surfaces, wet areas or demanding substrates.
Lapifix provides different adhesive grades for different applications. LX Standard is positioned for internal floor applications with ceramic and porcelain vitrified tiles, while LX Platinum is designed for applications including large-format tiles, natural stone, tile-on-tile work, swimming pools and external surfaces.
That product range illustrates an important principle: selecting an adhesive should come before trying to force every installation into one trowel size.
Tile installation products are used across very different construction markets, so recognised standards provide a useful reference point.
ISO 13007-1:2014 covers terminology, application properties and performance requirements for ceramic tile adhesives, including cementitious, dispersion and reaction-resin adhesives. ISO confirms that the standard applies to internal and external tile installations on walls and floors and was reviewed and confirmed in 2025.
For installers and buyers working internationally, checking the relevant product classification and technical documentation can provide more useful information than relying solely on marketing descriptions.
It is also worth remembering that an adhesive standard does not automatically tell you which trowel to use for every tile. Installation conditions still matter. The adhesive, tile, substrate and application technique need to work together.
Many installation problems begin with seemingly small shortcuts. One common mistake is choosing a trowel because it happens to be available rather than because it suits the tile and adhesive system.
Another is assuming that a thicker adhesive bed will automatically compensate for an uneven substrate. If the substrate needs correction, deal with that issue using an appropriate preparation method rather than relying on excessive adhesive.
Failing to check coverage is another avoidable problem. The top of the tile can look perfect while the underside tells a very different story. A quick inspection during installation can reveal poor transfer before the issue becomes widespread.
Installers should also avoid allowing adhesive to remain exposed for too long before tiles are placed. Open time varies by product and conditions, including temperature and humidity, so the manufacturer's instructions should always take priority.
Good results come from consistency. Start with a properly prepared substrate, mix the adhesive according to the manufacturer's instructions and spread only an area that can be tiled within the product's working limits.
Use the flat side of the trowel to key adhesive into the substrate where required, then comb the adhesive using the selected Tile Adhesive Trowel Size. Keep the ridges consistent and avoid random circular spreading.
Place the tile carefully and bed it into the adhesive using the appropriate movement. For larger tiles, follow the recommended installation method for back-buttering or additional adhesive application where required.
Finally, inspect the coverage. That simple check can tell you far more than the number printed on the handle of the trowel.
If you are standing in a tile shop wondering which trowel to buy, start with five questions: What size is the tile? What type of tile is it? Is the installation on a wall or floor? How flat is the substrate? And what does the adhesive manufacturer recommend?
From there, choose a Tile Adhesive Trowel Size that can realistically produce the required adhesive coverage without creating an unnecessarily thick or difficult-to-control bed.
For standard ceramic tiles, a smaller notch may be perfectly adequate. For medium porcelain tiles, you may need something larger. For large-format tiles, a deeper notch and a more comprehensive installation method may be required.
The best trowel is not the biggest one. It is the one that works with the adhesive, tile, substrate and installation method to achieve reliable coverage.
Yes. In general, a larger notch can deposit more adhesive than a smaller notch, although actual consumption depends on several variables, including trowel angle, substrate flatness, adhesive consistency and installation technique.
This means the Tile Adhesive Trowel Size can influence material planning as well as installation quality.
However, saving adhesive by using an undersized trowel is a false economy if it results in inadequate coverage. A small saving at the mixing stage can become a large repair cost later.
Conversely, using an unnecessarily large notch can increase consumption without delivering a meaningful installation benefit. The practical target is the correct amount of adhesive for the tile and application.
Before applying adhesive, confirm the tile manufacturer's requirements and the adhesive technical data. Make sure the substrate is appropriately prepared and that the selected trowel is compatible with the tile format and installation method.
Check that your adhesive is mixed correctly and that you have the right tools available. During the first few tiles, inspect adhesive transfer rather than assuming everything is working perfectly.
If coverage is poor, stop and investigate. Changing the Tile Adhesive Trowel Size may help, but the real solution could involve substrate preparation, adhesive consistency, application technique or back-buttering.
A few minutes spent checking the system can save hours of removing and replacing tiles later.
Choosing the right Tile Adhesive Trowel Size is less about memorising one number and more about understanding the relationship between the tile, adhesive, substrate and installation technique. Smaller tiles may need smaller notches, while large-format tiles can require deeper notches, careful adhesive distribution and sometimes back-buttering. Coverage should always be checked rather than assumed, and the adhesive manufacturer's technical guidance should remain the final reference.
For reliable tile installation, choosing the right adhesive is just as important as choosing the right trowel. Lapifix offers a range of tile adhesive solutions designed for different tile types and application conditions. If you need help identifying a suitable product for your project, explore the Lapifix range and contact Lapifix for product guidance before you begin. A few minutes of planning can make the difference between a tile installation that merely looks good on day one and one designed to perform for years.
The appropriate Tile Adhesive Trowel Size depends on the floor tile's dimensions, thickness, back profile, substrate and adhesive system. Smaller ceramic tiles may work with smaller notches, while medium and large porcelain tiles generally require deeper notches to achieve suitable coverage. Always verify the manufacturer's recommendations and perform a coverage check during installation.
Large-format tiles commonly require a larger notch than standard tiles because they need careful adhesive distribution across a larger surface. Depending on the tile and system, installers may use a 10 mm or larger notch and may also use back-buttering. The exact Tile Adhesive Trowel Size should be determined from the tile and adhesive manufacturer's installation guidance rather than tile size alone.
You can sometimes use the same trowel for different applications, but that does not mean it is always the best approach. Wall and floor installations have different practical demands, and tile size also changes the required adhesive bed. The Tile Adhesive Trowel Size should be selected according to the complete installation system rather than simply whether the tile is going on a wall or floor.
No. A larger trowel does not automatically create a stronger bond. The Tile Adhesive Trowel Size needs to provide the appropriate adhesive coverage without producing an unnecessarily thick or difficult-to-control layer. Correct adhesive selection, substrate preparation, application technique and tile bedding are equally important.
The most reliable method is to install a test tile and inspect the adhesive coverage underneath it. If the coverage is insufficient, review your Tile Adhesive Trowel Size along with the adhesive consistency, trowel angle, substrate condition and tile bedding technique. Manufacturer instructions should always be used as the primary reference for the final installation method.