

Planning a tile installation is a little like planning a good room layout: the details you ignore at the beginning tend to become very obvious at the end. A tile may look perfect in a showroom, yet the same tile can create awkward cuts, uneven borders or badly positioned grout lines once it reaches an actual room.
That is why a proper Tile Layout Planning Checklist should come before adhesive, spacers and cutting tools. Whether you are planning a bathroom, kitchen, living area, commercial floor or feature wall, the layout affects both appearance and installation efficiency. If you are also considering the fixing material, understanding tile adhesive solutions can help you coordinate the layout with the installation system rather than treating them as separate decisions.
A good layout is not simply about putting as many complete tiles as possible into a room. It is about creating balance, controlling cuts, allowing suitable joints, accounting for the actual tile dimensions and making sure the finished surface works around doors, corners, fixtures and other architectural features. This guide takes you through the process step by step, from measuring the space and selecting tile sizes to planning grout joints, patterns, cuts and material wastage.
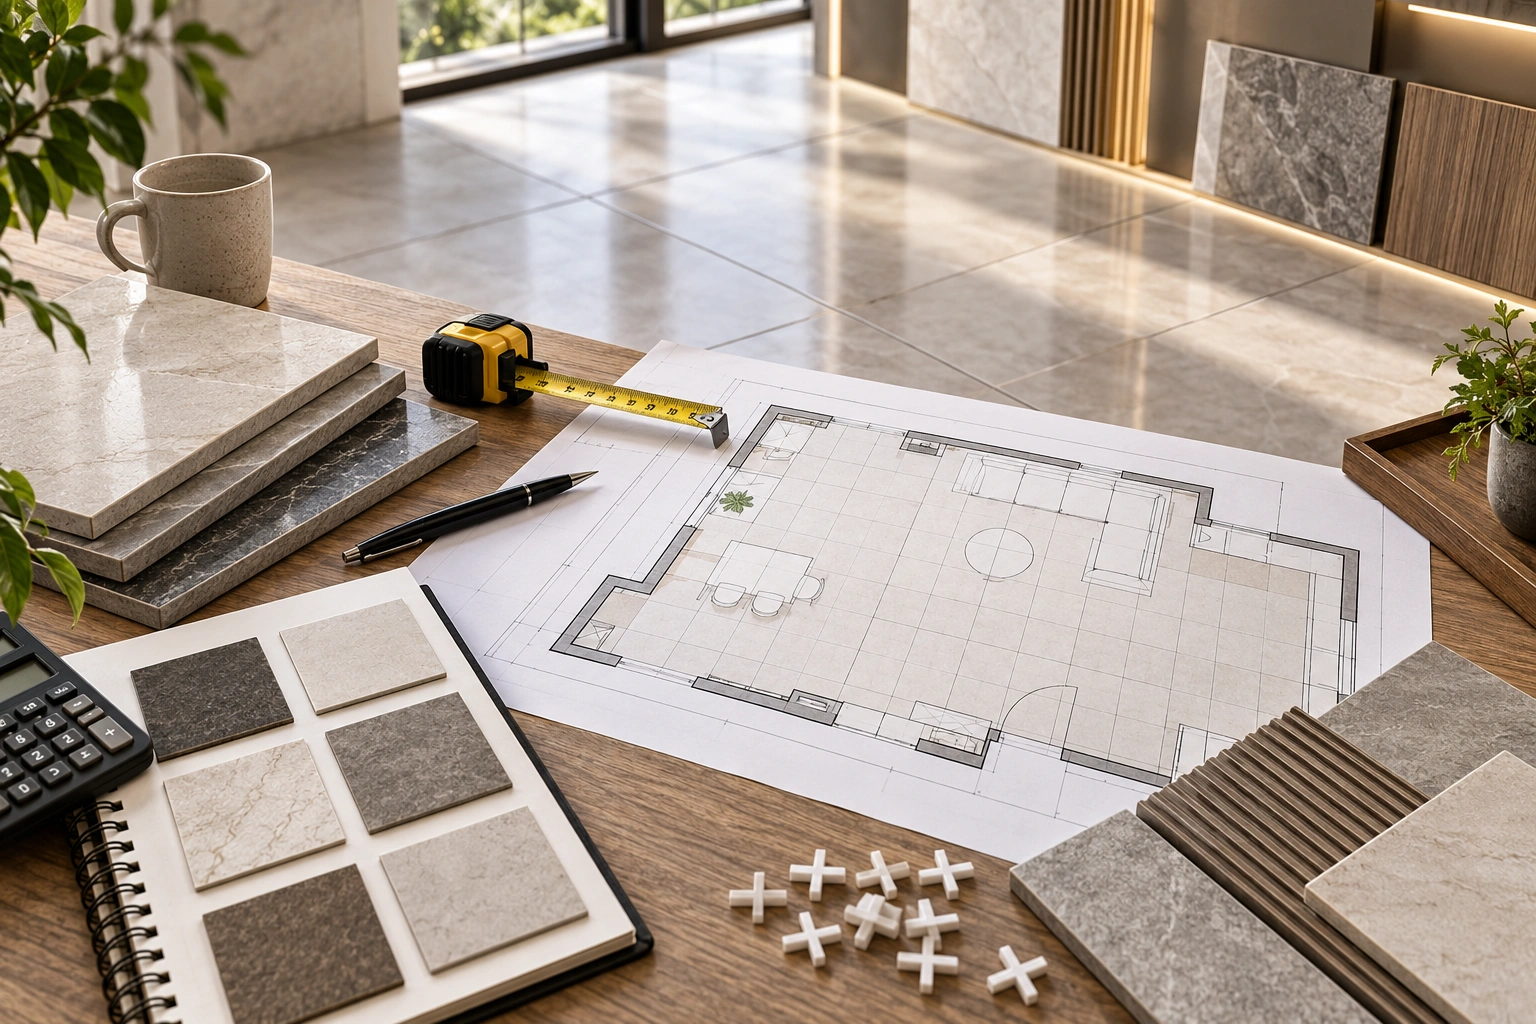
A Tile Layout Planning Checklist is a practical sequence of measurements and decisions used before tile installation begins. It helps determine where tiles should start, how they should be aligned, what size cuts will be required, how wide the joints should be and how much material needs to be ordered.
The purpose is simple: solve the visual and technical problems on paper before they become permanent on the floor or wall.
A professional layout considers the room dimensions, tile dimensions, grout joint width, pattern, focal points, transitions, movement requirements and installation tolerances. It also considers the fact that the stated tile size may not be its exact installed face dimension. Manufacturing tolerances and tile variation can affect the final grid, particularly when narrow grout joints are planned.
Industry guidance also stresses the importance of balancing layouts and avoiding unnecessarily small cuts where practical.
It is tempting to start fixing tiles as soon as the substrate is ready. That is where many avoidable problems begin.
Once adhesive has been spread and the first row is fixed, changing the layout becomes much harder. A few millimetres of poor planning can eventually turn into a very narrow strip at a doorway or an awkward sliver beside a highly visible wall.
A Tile Layout Planning Checklist gives you a chance to test the installation before committing to it. You can move the starting line, change the orientation, adjust the pattern or reconsider the tile size while everything is still flexible.
This is particularly useful with large-format tiles. Bigger tiles can create a cleaner appearance because there are fewer grout lines, but they also make room dimensions, substrate flatness and cutting decisions more noticeable. A small layout error can become a very large visual problem.
The first part of any Tile Layout Planning Checklist is accurate measurement. Do not assume that a room is perfectly square simply because it looks square.
Measure the length and width at several points. For walls, check the height at both ends and in the centre. Note recesses, columns, niches, door openings, floor wastes, plumbing penetrations, built-in cabinets and other features that can affect the tile grid.
For irregular rooms, make a simple sketch and write the measurements directly onto it. This does not need to be an architectural masterpiece. It only needs to be accurate enough to reveal where the tile pattern will change.
Remember to measure the actual installation area rather than relying entirely on the property's original plans. Walls can move slightly out of square, existing construction can introduce variations and renovation work can expose dimensions that were hidden previously.
The next step is to measure the actual tile. A nominal 600 × 600 mm tile, for example, should not automatically be treated as exactly 600 × 600 mm for detailed layout calculations.
Tile type, manufacturing tolerances, calibration and rectification can influence the actual dimensions. ISO 13006 provides internationally recognised classifications and characteristics for ceramic tiles, making it a useful reference when understanding tile specifications. The current published edition is ISO 13006:2018, which was reviewed and confirmed in 2024.
This is one reason a Tile Layout Planning Checklist should use the actual supplied tile wherever possible, especially for premium installations with tight joint requirements.
Tile direction can completely change how a room feels.
Long rectangular tiles installed along the length of a narrow room can visually emphasise the room's proportions. Turning the same tiles across the room can produce a different effect. Neither approach is automatically correct; the right decision depends on the architecture, focal points and design objective.
The starting point matters just as much. In many installations, the centreline provides a useful reference, but a geometric centre is not always the best visual centre. Doorways, fireplaces, kitchen islands, shower niches and other focal points may deserve priority.
A good Tile Layout Planning Checklist therefore asks a practical question: where will people naturally look first?
If the most visible wall has a strong feature, it may make more sense to balance that wall rather than blindly centre every surface.
Tile size and layout are closely connected.
Large tiles can make an open room appear calmer because they reduce the number of grout lines. Smaller tiles can offer greater flexibility around curved areas, compact rooms and detailed patterns. Rectangular tiles can create directional movement, while square tiles often create a more structured grid.
The best tile size is therefore not simply the largest tile available.
Consider the room's dimensions, installation surface, drainage requirements, number of penetrations and desired visual effect. A large tile that leaves tiny perimeter cuts may actually create a less balanced result than a slightly smaller tile that produces wider, more consistent pieces.
For large-format installations, the substrate also needs appropriate preparation. Tile manufacturers and installation-system manufacturers may have specific requirements for flatness, adhesive selection, handling and coverage.
Grout joints are not an afterthought. They are part of the layout.
The Tile Layout Planning Checklist should record the intended joint width before you calculate the number of tiles required. If the tile face measures 600 mm and the planned joint is 3 mm, the module used for layout is not simply 600 mm. The joint becomes part of the repeated spacing.
Joint width also needs to account for tile variation. Industry guidance commonly considers the variation in actual tile facial dimensions when determining the minimum practical grout joint. One industry explanation of ANSI/TCNA guidance states that the actual joint should be at least three times the measured variation in tile facial dimensions.
That means a very narrow joint should never be selected purely because it looks modern in a photograph.
Imagine you are laying rectangular tiles across a wall. If the tiles vary slightly from piece to piece, a very tight joint leaves almost no room to absorb that variation. The installer may struggle to maintain alignment, and the finished grid can look uneven.
A slightly wider joint can sometimes produce a much more consistent appearance.
The goal is not simply “smallest possible joint”. The goal is an appropriate joint for the actual tile, pattern, installation conditions and manufacturer recommendations.
Pattern planning deserves its own place in the Tile Layout Planning Checklist.
Straight lay, brick, running bond, stack bond, diagonal, herringbone and other patterns all affect how the dimensions work together. A pattern that looks excellent on a mood board may produce excessive cuts in a real room.
This is particularly important with rectangular tiles. A common offset pattern can create undesirable lippage considerations depending on tile dimensions and geometry. Large-format tiles may also require a particular offset or installation method recommended by the tile manufacturer.
Before cutting anything, lay several tiles out dry. Include the intended joint width. Look at the full pattern from different angles.
If the layout produces a tiny cut at a highly visible edge, test whether shifting the entire pattern creates a better result. Industry guidance encourages centring and balancing layouts while avoiding excessive cuts and very small pieces where practical.
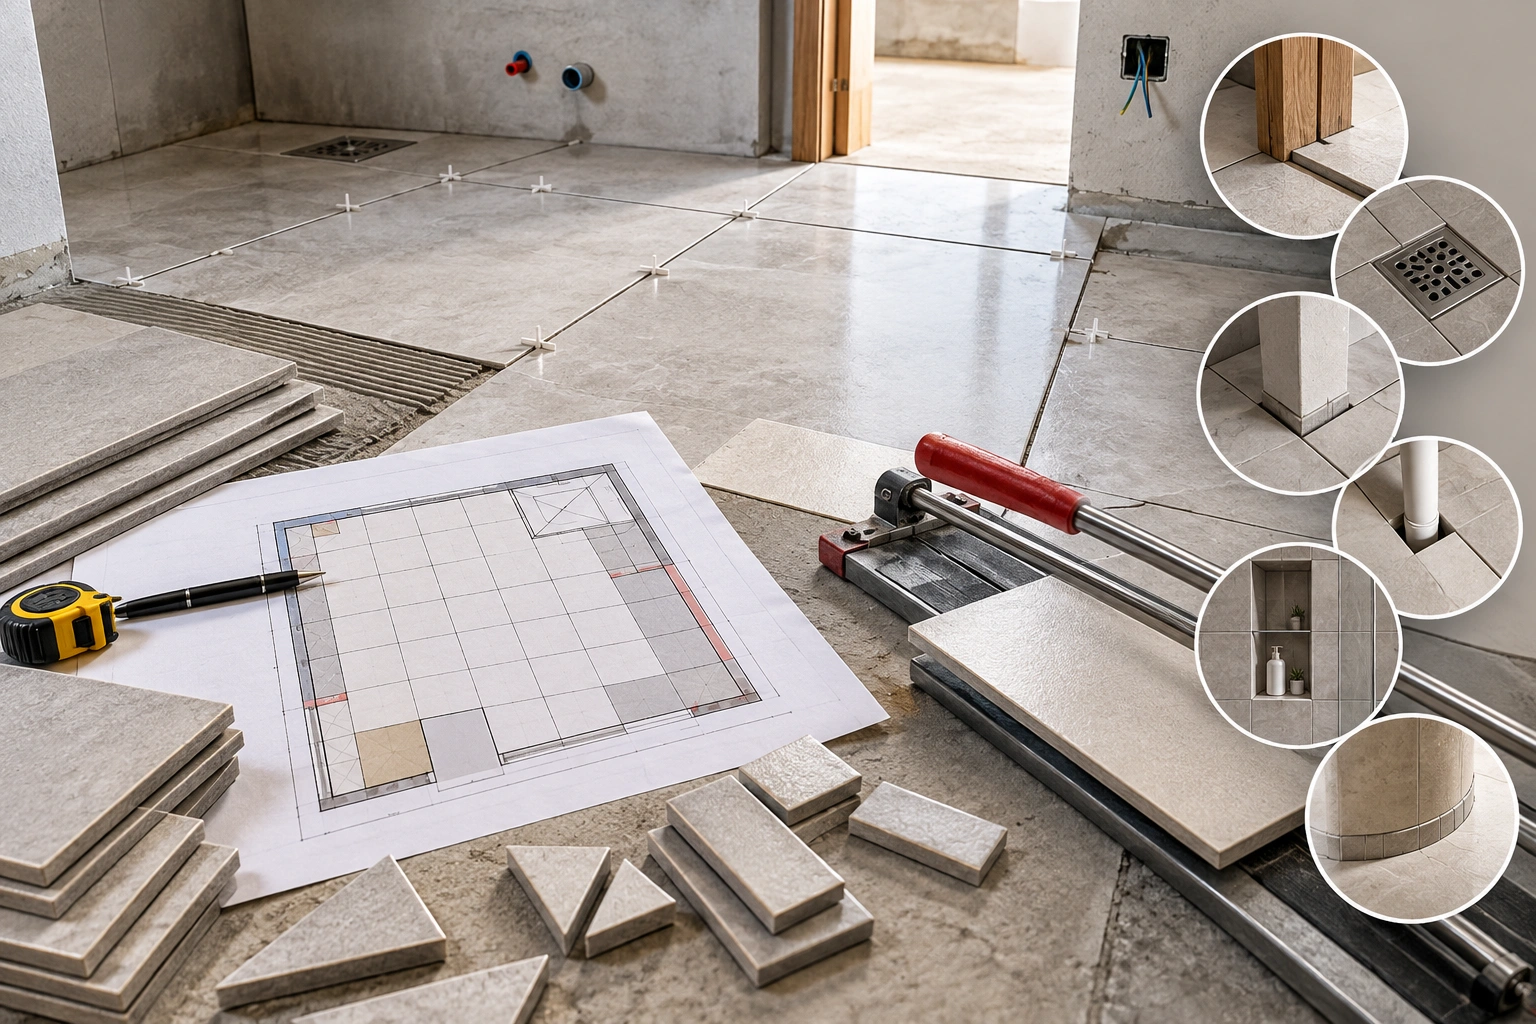
A proper tile cutting plan can save both time and material.
Instead of cutting tiles as you reach each wall, identify the major cuts before installation. Mark where full tiles, half tiles, edge pieces and special cuts will go.
This becomes especially useful around:
Doorways and thresholds
Floor wastes and drains
Columns and corners
Plumbing outlets
Electrical boxes
Shower niches
Kitchen cabinets
Curved or irregular walls
The idea is not to eliminate every cut. Cuts are a normal part of professional tile installation. The objective is to make the cuts intentional, balanced and visually appropriate.
A strong Tile Layout Planning Checklist should also identify which cut pieces can be reused elsewhere. A clean offcut from one side of a room may be exactly what you need for another location.
Tile wastage calculation should happen before you place the final order, not after you discover that the last few square metres are missing.
Start with the measured installation area, then account for the tile dimensions, pattern, number of cuts and complexity of the room. Straightforward installations may have less waste than rooms with numerous corners, penetrations or complicated patterns.
There is no universal wastage percentage that works for every project. A simple rectangular room laid in a straightforward pattern is very different from a herringbone installation with multiple niches and angled cuts.
It is also sensible to retain some tiles from the same batch for future repairs where possible. Colour and shade can vary between production batches, so spare tiles can become extremely useful years later.
A beautiful tile layout can still look wrong if the surrounding architecture is out of alignment.
For walls, check whether the surface is plumb and whether corners are square. For floors, inspect the overall flatness and identify slopes required for drainage.
Do not assume tile adhesive should be used as a substitute for proper substrate preparation. Adhesive systems are designed for bonding tiles within their specified application conditions, not for correcting every major structural or surface defect.
The substrate, tile and adhesive need to work as one installation system. Product selection should therefore be checked against the actual tile, surface and environmental conditions. A tile adhesive guide can help explain the relationship between adhesive selection and installation requirements.
The easiest way to use a Tile Layout Planning Checklist on site is to turn the main decisions into a simple pre-installation review.
|
Planning Item |
What to Check |
Why It Matters |
|
Room measurements |
Length, width, height and irregular areas |
Establishes the actual tile field |
|
Tile dimensions |
Actual supplied tile size |
Prevents inaccurate module calculations |
|
Tile orientation |
Horizontal, vertical or directional |
Influences visual proportions |
|
Starting point |
Centreline, focal point or reference wall |
Controls overall balance |
|
Grout joint |
Width and consistency |
Affects appearance and tile spacing |
|
Pattern |
Straight, offset, diagonal, herringbone, etc. |
Changes cuts and material requirements |
|
Edge cuts |
Size and location of perimeter pieces |
Prevents awkward slivers |
|
Fixtures |
Drains, outlets, doors, niches and cabinets |
Helps position cuts correctly |
|
Substrate |
Flatness, strength and suitability |
Supports reliable installation |
|
Movement joints |
Required locations and transitions |
Allows planned movement |
|
Tile wastage |
Cuts, pattern and spare tiles |
Helps order enough material |
|
Adhesive |
Suitable product and application method |
Supports proper tile bonding |
This table is not a substitute for the tile manufacturer's installation instructions or applicable local standards. It is a practical planning tool to make sure the major decisions have been considered before work begins.
One of the most overlooked parts of a Tile Layout Planning Checklist is movement accommodation.
Tile assemblies are not completely static. Tile, adhesive, substrate and surrounding structures can respond differently to temperature, moisture and loading. Without appropriate movement accommodation, stresses can contribute to cracking or debonding.
Industry guidance identifies movement joints as an important part of durable tile assemblies, with requirements depending on the installation and environment.
This means movement joints should be considered during layout planning rather than added as an emergency solution after the tiles are fixed.
For a worldwide project, always follow the applicable local building requirements, tile installation standards and product manufacturer's instructions. Requirements can vary by country, climate, substrate and project type.
The best-looking tile grid does not exist in isolation. It has to meet the rest of the building.
Door thresholds, transitions between flooring materials, skirting boards, cabinetry and sanitary fixtures all affect where tiles should terminate.
For example, you may prefer a full tile to land neatly at a doorway rather than finishing with a narrow strip directly under the door. In a bathroom, the position of the drain may influence the tile pattern. In a kitchen, cabinet lines can become useful visual references.
A professional Tile Layout Planning Checklist should therefore include architectural features before the final starting line is approved.
Dry-laying is one of the simplest ways to catch layout mistakes.
Place a representative section of tiles on the floor or use a measured layout line to simulate the pattern. Include the intended joint width and check the edges.
Stand back.
Look at it from the doorway.
Then look at it from the position where people will normally enter or use the room.
This simple step can reveal problems that are difficult to see on a drawing. It can also help confirm whether the pattern feels centred, whether the cuts are balanced and whether the focal points work.
Once the layout is approved, mark reliable reference lines and proceed with installation according to the adhesive and tile manufacturer's instructions.
Tile size is one of the biggest variables in the entire planning process.
Small tiles provide flexibility but introduce more grout lines. Medium tiles often provide a balance between handling, pattern control and visual simplicity. Large-format tiles create fewer joints and can deliver a highly streamlined appearance, but they require greater attention to substrate preparation, handling, adhesive coverage and layout accuracy.
There is no universal “best” tile size.
A good Tile Layout Planning Checklist treats tile size as part of the room rather than an isolated product choice.
For example, a 600 × 1200 mm tile can look excellent in a spacious room, but forcing that same format into a small, heavily interrupted space could create numerous awkward cuts. The right choice depends on the relationship between tile dimensions and the architecture.
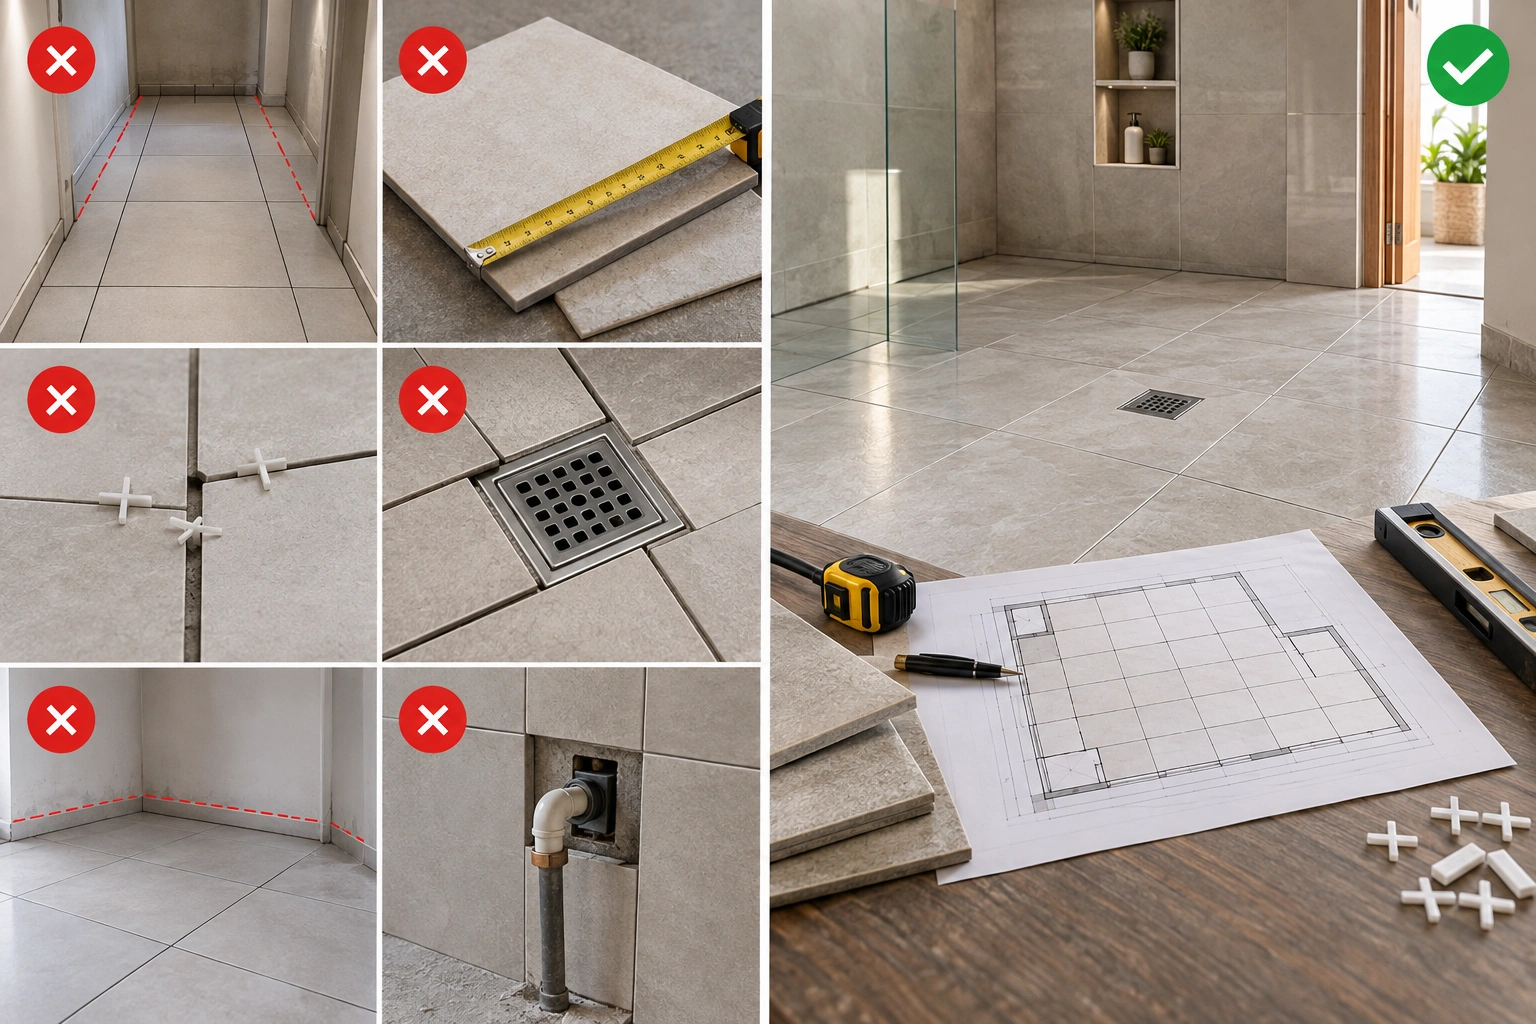
Most layout problems are surprisingly predictable.
The first is starting from one wall without checking the opposite side. This can create an attractive first row but an awkward final strip.
The second is ignoring actual tile dimensions. Nominal sizes are useful for product identification, but detailed planning needs actual dimensions and the intended joint.
The third is choosing the grout joint after the layout has already been calculated. Joint width changes the tile module and therefore changes the layout.
The fourth is forgetting fixtures until the installation has already started. Drains, doorways, niches and outlets should be considered before cutting.
The fifth is treating every room as perfectly square. Real buildings often have variations, particularly in renovation projects.
Finally, avoid assuming that an online image represents a universal installation rule. Tile, substrate, adhesive, climate and local requirements all matter.
Large-format tiles deserve extra attention because their size amplifies small installation errors.
Start with substrate preparation. Check the manufacturer's flatness requirements and ensure the surface is suitable before beginning. Then establish accurate reference lines and plan the movement accommodation required for the project.
Adhesive selection also matters. For demanding applications, the adhesive manufacturer may specify particular performance classes or installation techniques. For example, Lapifix's premium adhesive range includes products designed for large-format tiles and more demanding environments.
For large tiles, the installation method may also require attention to adhesive coverage and the relationship between the tile back and substrate. The exact method should always follow the product and tile manufacturer's requirements.
Floor tile layout planning and wall tile layout planning share the same basic principles, but the priorities can differ.
Floor layouts need to consider traffic, transitions, drainage, floor slopes and movement. Wall layouts often place more emphasis on eye-level appearance, corners, niches, fixtures, window openings and where the tile terminates at ceilings or adjacent surfaces.
A bathroom wall, for example, may need the layout to work around a shower niche while maintaining visual symmetry. A large open floor may instead be planned around a central axis, doorway or major furniture arrangement.
The underlying principle remains the same: plan the visible and technical elements together.
Before the first tile is permanently fixed, run through your final Tile Layout Planning Checklist.
Confirm the room measurements, actual tile dimensions, tile orientation, pattern, grout joint, reference lines, perimeter cuts, fixture positions, movement requirements, substrate condition, adhesive system and estimated wastage.
Then check the actual tiles. Make sure shade, calibre, finish and batch information are appropriate for the installation. If the project has a specified design or architect's drawing, compare the proposed site layout with the approved design before proceeding.
For ceramic and porcelain tile specifications, internationally recognised standards such as ISO 13006 provide a useful reference for tile classification and characteristics.
The more decisions you confirm before installation, the fewer surprises you are likely to face once adhesive is on the floor.
A successful tile installation begins long before the first tile touches adhesive. The right Tile Layout Planning Checklist brings together accurate measurements, actual tile dimensions, tile size, grout joint width, pattern, reference lines, cutting requirements, fixtures, substrate preparation, movement accommodation and material wastage. Using a Tile Visualizer App at the planning stage can also help you preview different tile sizes, colours and patterns before making a final decision. When these decisions are made in advance, the finished installation is more likely to look balanced, use materials efficiently and perform as intended.
If you are planning a project and need to consider the relationship between tile selection, layout and fixing materials, explore tile adhesive solutions from Lapifix and choose products according to the tile, substrate and application requirements. A well-planned installation is not about making every decision complicated; it is about making the important decisions before the work becomes permanent.
A Tile Layout Planning Checklist is a pre-installation planning tool used to review room measurements, tile dimensions, grout joints, tile patterns, starting points, cuts, fixtures, movement requirements, substrate conditions and material quantities before tile installation begins.
Start by measuring the actual installation area and the supplied tiles. Decide the tile orientation, grout joint and pattern, then calculate the layout from reliable reference lines. Dry-lay representative sections where possible and adjust the starting position to achieve balanced cuts and a visually coherent result.
The correct grout joint depends on the actual tile dimensions, dimensional variation, tile type, pattern and manufacturer's recommendations. A very narrow joint is not automatically better. Industry guidance considers tile variation when determining minimum joint width, so the actual supplied tiles should be checked before installation.
Not necessarily. Centre-and-balance principles are useful, but the best layout can depend on focal points, doorways, fixtures, room geometry and the need to avoid very small cuts. A professional layout considers the whole space rather than applying one rule blindly.
There is no single wastage percentage that suits every project. Straight layouts in simple rectangular rooms may require less additional material than complex patterns, irregular spaces or installations with many cuts. Your tile cutting plan, pattern and room geometry should be considered before ordering, with additional tiles retained for future repairs where practical.