

Cracked grout can be a small maintenance issue, but it can also indicate movement or a problem beneath the tiles. If you are asking why is tile grout cracking, the answer may involve excess water during mixing, poor joint filling, unsuitable curing conditions, loose tiles, substrate movement or missing movement joints. The visible crack alone rarely proves which factor is responsible.
Before repairing cracked tile grout, inspect the pattern, location and condition of the surrounding tiles. A stable installation with one isolated crack may need a local repair. Repeated cracking, movement underfoot, hollow-sounding tiles, damaged tiles or signs of water ingress call for a broader assessment. This guide explains likely causes, troubleshooting, repair options and prevention.
The short answer to why is tile grout cracking is that the grout may have shrunk or been installed incorrectly, or the tiled assembly may be moving more than the joints can accommodate. Grout is a rigid joint-filling material in many installations; it is not designed to absorb every type of building movement.
A crack may appear within the grout, along the edge where grout meets tile, or repeatedly along a straight line. These patterns can offer clues, but they are not definitive diagnoses. The Tile Council of North America notes that several different issues can cause cracked or loose grout and that an inspection may be needed to establish the cause. See TCNA's cracked-grout guidance.
The right response depends on whether the problem is isolated to the grout or connected to loose tiles, substrate deflection, a movement joint or a moisture-related issue. Anyone searching why is tile grout cracking should first distinguish a surface defect from movement in the tiled assembly.
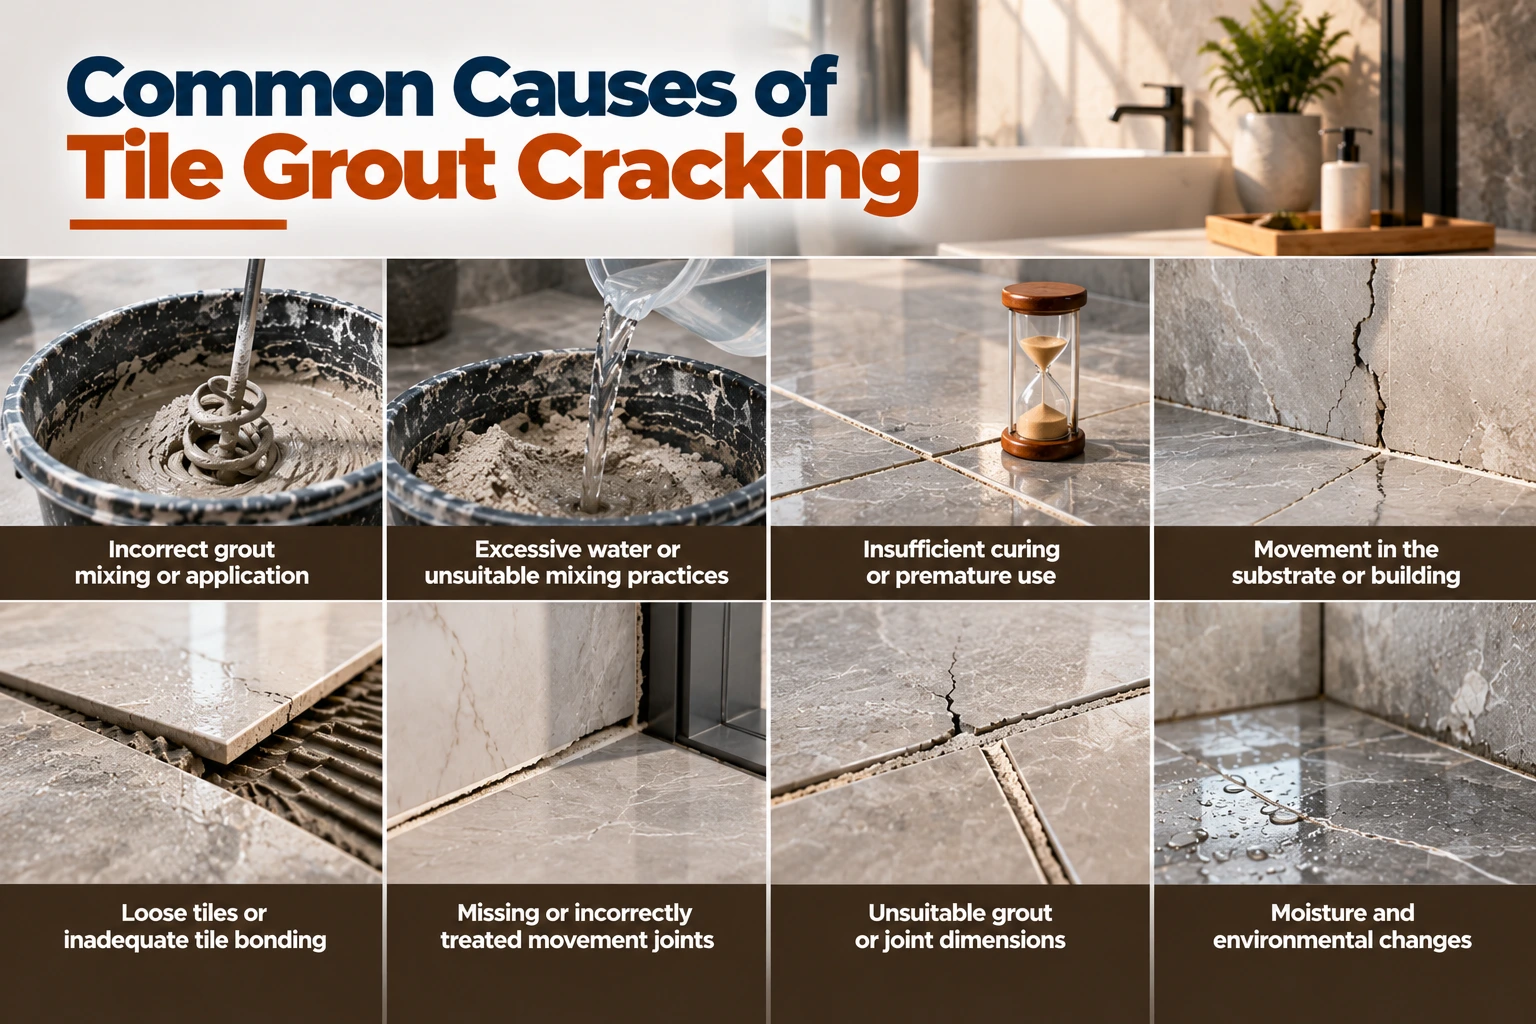
Cementitious grout must be prepared and applied according to its product instructions. Incorrect proportions, poor mixing, insufficient packing into the joint or cleaning the surface too aggressively can weaken the finished joint. If grout does not fill the joint adequately, the thin surface layer may crack or break away.
When considering why tile grout cracking shortly after installation, review how the material was mixed, applied and cleaned. A crack soon after installation may be related to workmanship or curing, but timing alone does not confirm the cause. This is an important consideration when asking why tile grout cracking within the first few weeks.
Adding more water than specified can make grout easier to spread, but it can also affect its final structure. Excess liquid must leave the mixture as it dries, potentially contributing to shrinkage, pinholes or weaker grout. Excessive water during cleanup can also affect some grout installations.
Do not try to correct a mixture that has started to set by adding more water unless the product instructions explicitly permit the action. Follow the manufacturer's stated mixing and working-time requirements.
Grout needs the conditions and time specified by its manufacturer to develop its intended properties. Temperature, humidity, airflow, tile porosity and the type of grout can affect curing. Cleaning heavily, exposing the area to water or putting the installation into service too early may compromise the result.
The correct curing period varies by product and site conditions. Avoid applying a universal waiting time to every grout.
Substrates can deflect, expand, contract or move at joints. If movement exceeds what the tile assembly can accommodate, stress may appear in grout joints and sometimes in the tiles themselves. Movement can arise from the floor structure, an unstable wall, changes in temperature or moisture, or building movement.
If cracks recur in the same line, particularly alongside cracked tiles or other signs of movement, do not assume that new grout will solve the problem. In such cases, why is tile grout cracking is a question that needs an assessment of the substrate and joint design, not just the grout itself.
A tile that moves under pressure can place repeated stress on the surrounding grout. Poor substrate preparation, inadequate adhesive contact or a failure in the bonding layer may contribute to tile movement. Grout cracking can therefore be a symptom rather than the root problem.
If grout cracks and tiles sound hollow, shift or feel unstable, avoid simply filling the joints. A qualified installer may need to assess the bond and determine whether tiles must be lifted and reset.
Some tiled installations require movement joints at perimeters, changes of plane, structural joints and other designated locations. If a joint intended to accommodate movement is filled with rigid grout, the grout may crack as adjacent surfaces move.
The required locations and details depend on the project and applicable installation guidance. Do not bridge an existing structural or movement joint with rigid grout. Use the specified flexible sealant or joint system where the design calls for it.
Grout must be suitable for the tile, joint width, exposure and intended use. A product used outside its stated limits may not perform as expected. Joint dimensions also affect how the grout can be packed and finished.
The issue is not always that a grout is inherently poor quality. It may be a mismatch between the material and the application, or a failure to follow the product instructions.
Repeated wetting, temperature changes or changes in substrate moisture can affect some tiled assemblies. These conditions may contribute to stress or reveal an existing installation weakness, but moisture exposure alone does not prove why a joint has cracked.
In bathrooms and other wet areas, inspect the surrounding joints, corners, penetrations and visible signs of water damage. Grout is not a substitute for a correctly designed and installed waterproofing system.
When investigating why tile grout is cracking in a particular location, start with a visual inspection rather than immediately removing material. Note whether the crack is isolated or repeated, whether it follows a straight line, and whether it appears at a corner, perimeter or change of plane.
Check whether the adjacent tiles are stable. Look for chipped tile edges, gaps, loose pieces of grout, hollow sounds, movement under pressure, staining or signs of moisture. Do not force a tile to test it, and do not disturb a suspected waterproofing layer.
Use the following table as a guide to possible causes and next steps. These symptoms are clues, not definitive diagnoses. The question why tile grout cracking cannot be answered reliably from a photograph or one symptom alone.
|
Visible symptom |
Possible contributing cause |
Recommended next step |
|
One isolated hairline crack |
Local grout or application issue |
Inspect the joint and nearby tiles |
|
Repeated cracks along a straight line |
Movement or a joint-detailing issue |
Review the substrate and movement-joint provision |
|
Cracked grout with loose or moving tiles |
Bonding or substrate problem |
Assess tile stability before regrouting |
|
Cracks returning after repair |
Underlying cause remains unresolved |
Investigate before attempting another repair |
|
Cracking at a corner or perimeter |
Movement may not be accommodated |
Check whether the location requires flexible sealant |
|
Cracks with staining or dampness |
Possible moisture ingress or another water source |
Investigate the moisture source and wet-area system |
If you are still asking why tile grout cracking after checking the visible symptoms, avoid guessing based on appearance alone. A site inspection may be necessary, particularly if several joints are affected or damage is progressing.
Bathrooms combine moisture, cleaning, temperature changes and transitions between different surfaces. These conditions make correct joint detailing and waterproofing important. A crack near a shower corner or where a wall meets a floor may indicate that a movement joint has been filled with rigid grout instead of the specified flexible material.
A cracked joint does not automatically mean water has entered the building, but grout cracks can create a route for water to pass into parts of the installation that were not intended to remain wet. The risk depends on the design, waterproofing system and location of the crack.
If you notice persistent dampness, staining in an adjacent room, loose tiles or recurring cracks in a shower, investigate the cause rather than treating the visible grout alone. For wet areas, why is tile grout cracking should prompt checks of corners, penetrations and the waterproofing details as well as the joint.
Do not assume that applying a sealer or fresh grout will restore a damaged waterproofing system.
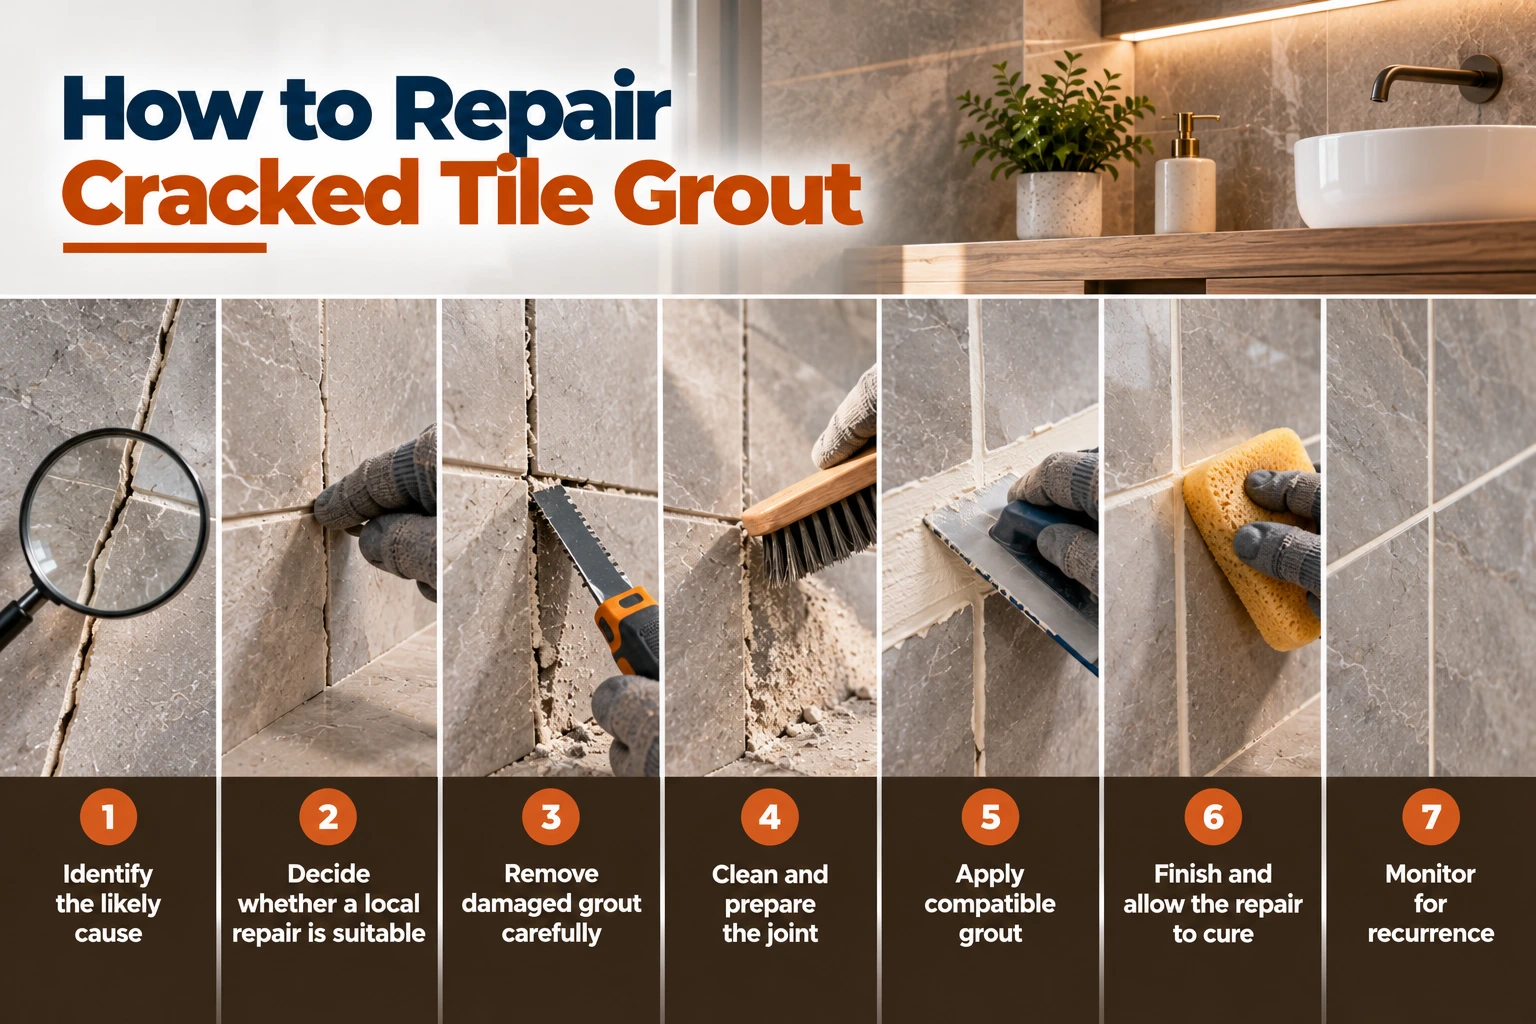
The safest repair depends on the likely cause, the grout type, the joint location and the condition of the tiles. Before deciding why tile grout cracking in your installation, confirm that the joint is stable and suitable for a grout repair.
Inspect the joint and surrounding tile surface. If tiles move, multiple cracks follow a line, or there are signs of water ingress or substrate movement, pause and seek an appropriate assessment. Repairing grout alone is unlikely to resolve an underlying structural or bonding problem.
An isolated crack in an otherwise stable joint may be suitable for a limited repair. If grout is crumbling across a large area, cracks recur, or the joint is actually a movement joint, a different solution may be needed.
Where replacement is appropriate, remove the damaged material using a method suitable for the tile and joint. Work carefully to avoid chipping tile edges, damaging adjacent materials or cutting into a concealed waterproofing membrane. There is no universal removal depth for every product and situation; follow the grout manufacturer's repair instructions.
Remove loose particles and dust, and prepare the joint as directed by the selected grout manufacturer. Make sure the joint conditions meet the product's requirements before applying new material. Do not leave debris that could interfere with bonding.
Choose grout suitable for the existing tile, joint width, environment and intended application. Mix and apply it according to the technical instructions. Pack the joint properly and use the recommended cleanup method; excessive water during cleanup may affect some cementitious products.
Finish the joint as instructed and protect it for the specified curing period. Avoid water exposure, cleaning or normal use until the product instructions allow it. Curing times differ between products and conditions.
Inspect the repaired area after it has returned to service. If the same crack returns, treat it as evidence that the cause may not have been resolved. Repeating the same cosmetic repair is unlikely to be a durable solution if movement or tile instability continues.
Regrouting may be appropriate when damaged grout is limited to a stable joint and the tiles and substrate are sound. The damaged material should be removed and replaced using a compatible product and the manufacturer's procedure. Simply spreading new grout over a cracked surface is generally not a reliable repair because the new layer may not bond or fill the joint properly.
Flexible sealant is often used at designated movement joints and changes of plane, such as certain wall-to-floor or corner junctions. The exact detail depends on the installation design and product instructions. Rigid grout should not be substituted where a flexible joint is required.
Seek professional assessment if tiles are loose, cracks are widespread or recurring, tiles themselves are cracking, the floor or wall appears to move, or there are signs of water ingress. A professional can inspect the tile bond, substrate and joint design to identify whether a local grout repair is appropriate.
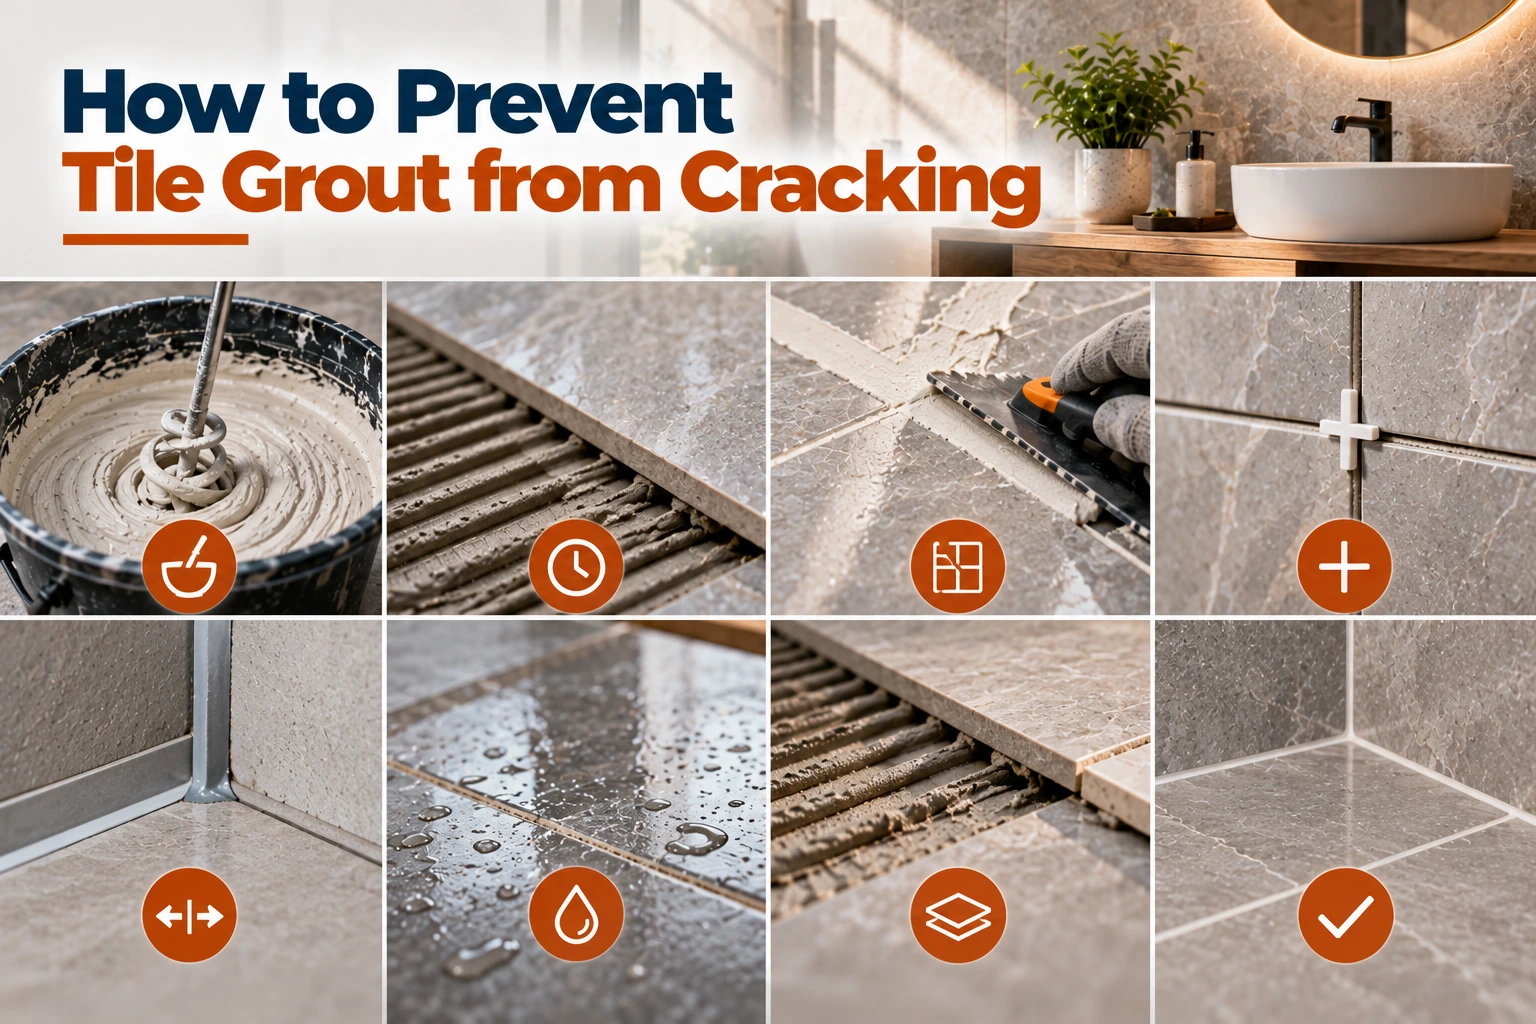
Prevention starts before the grout is mixed. If you have previously wondered why is tile grout cracking repeatedly, review the substrate, joint design and installation process before choosing replacement material.
The substrate must be suitable, stable and prepared for the tile installation. The grout must be compatible with the tiles, joint dimensions and exposure conditions, and the installation must include movement joints where required.
Use this prevention checklist:
Follow the grout manufacturer's specified water ratio, mixing method, working time and cleanup instructions.
Ensure the tile-setting material has cured for the period required before grouting.
Pack grout fully into joints and remove spacers or debris where the installation instructions require it.
Use a suitable grout for the tile type, joint width and intended environment.
Preserve structural and movement joints and treat designated movement locations with the specified system.
Protect newly grouted surfaces from premature water exposure, cleaning and service use.
Investigate unstable substrates or loose tiles before grouting or repairing joints.
For further background on selecting materials, see Lapifix's guide to different grout types and their uses. This article focuses on diagnosing and resolving cracking rather than repeating a general comparison of grout products.
No. Cracked grout does not automatically mean the tiles need replacing. If the tiles remain firmly bonded, the substrate is stable and the damage is limited to a small section of grout, repair may be possible without removing the tiles.
However, the answer changes if tiles move, the adhesive bond has failed, the tiles are cracked, or the substrate continues to move. In those cases, removing and resetting tiles or repairing the underlying construction may be necessary. The appropriate solution depends on the inspection findings.
When deciding why tile grout cracking across a wider area, consider whether the pattern suggests a single local defect or a system-wide issue. Replacing the grout without addressing a moving substrate can lead to repeat damage.
A frequent mistake is filling a crack with fresh grout before checking why it formed. This can hide the symptom temporarily while leaving movement, poor bonding or a missing movement joint unchanged.
Another mistake is applying new grout over old cracked grout without preparing the joint as required. The repair may have insufficient depth or poor contact. Using the wrong product, adding extra water, cleaning too aggressively or exposing the repair to water too soon can also compromise performance.
Avoid using rigid grout in a joint designed to accommodate movement. Do not use sharp tools carelessly around tile edges or waterproofing layers. If the cause is unclear or the damage recurs, get the installation assessed rather than repeating a repair that has already failed.
Understanding why tile grout cracking begins with looking beyond the visible line. Incorrect mixing, inadequate joint filling, curing problems, loose tiles, substrate movement and missing movement joints can all contribute. The crack's pattern helps guide an inspection, but it does not establish the cause on its own. In short, why tile grout cracking must be answered by checking both the joint and the tiled assembly.
For stable installations with isolated damage, careful grout replacement may be enough. Where cracks recur, tiles move, or water ingress is suspected, investigate the underlying problem before repairing the surface. Use flexible sealant at joints designed for movement and follow the selected product's technical instructions.
Lapifix provides tile installation materials, including Lapifix Tiles Grout. Review the product information and confirm suitability for your tile, joint and environment before use. When the cause of cracking is uncertain, consult a qualified tiling professional to help determine the appropriate repair.
Grout may crack after installation because of excess mixing water, poor joint filling, unsuitable curing conditions, premature use, substrate movement or loose tiles. The timing and pattern provide clues, but the surrounding installation should be inspected before choosing a repair.
Cracked grout may allow water to pass through joints, but whether this causes a leak depends on the complete installation and waterproofing system. If there is dampness, staining or recurring cracking in a wet area, investigate the source rather than relying on new grout alone.
Applying a thin layer over cracked grout is generally not a dependable repair. Where regrouting is suitable, damaged material usually needs to be removed and the joint prepared according to the product instructions. First establish that the tiles and substrate are stable.
Often, yes, when the repair involves replacing damaged grout. The amount to remove depends on the product and repair method; follow the manufacturer's instructions and avoid damaging tile edges or waterproofing. If the joint is moving, removing grout alone will not fix the underlying cause.
Bathroom grout can crack because of incorrect installation, tile movement, substrate movement or a missing flexible joint at a corner or change of plane. Moisture may reveal or aggravate an existing problem, but it is not the only possible cause.
It can be. If grout cracks alongside movement, hollow sounds or shifting tiles, the tile bond or substrate may need investigation. Cracked grout by itself does not prove that tiles are loose, so inspect the surrounding area carefully.
Use the material specified for the joint. Many changes of plane and designated movement joints require a suitable flexible sealant rather than rigid grout, but the exact requirements depend on the installation design and product instructions.
Identify the original cause before repairing it. Use compatible materials, prepare the joints properly, follow mixing and curing instructions, ensure the substrate and tiles are stable, and provide the movement joints required by the installation. Recurring cracks may need professional assessment.